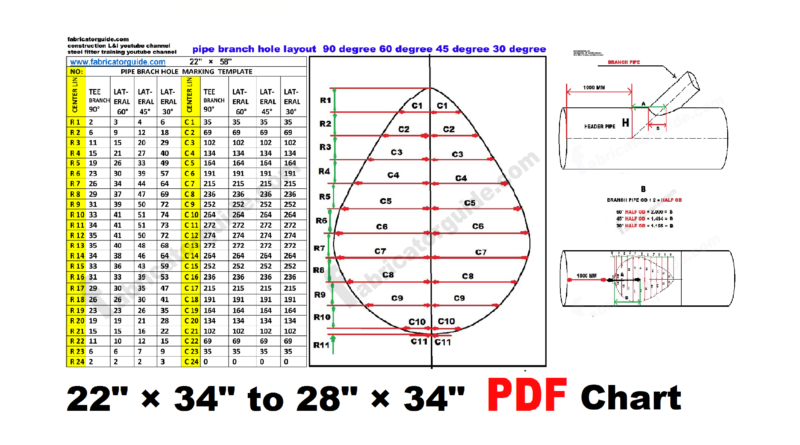
pipe branch Hole marking cut back PDF chart 22″ × 34″ to 28″ × 34″
pipe branch Hole marking cut back PDF chart 22″ × 34″ to 28″ × 34″
pipe branch Hole marking Layout PDF Chart 90 Degree 60 Degree 45 Degree 30 Degree
PDF Chart FREE download
यह PDF चार्ट के जरिए पाइप ब्रांच होल का मार्किंग करने का तरीका बताया गया है
पाइप ब्रांच 90 डिग्री 60 डिग्री 45 डिग्री 30 डिग्री में पाइप ब्रांच का होल मार्किंग कर सकते हैं
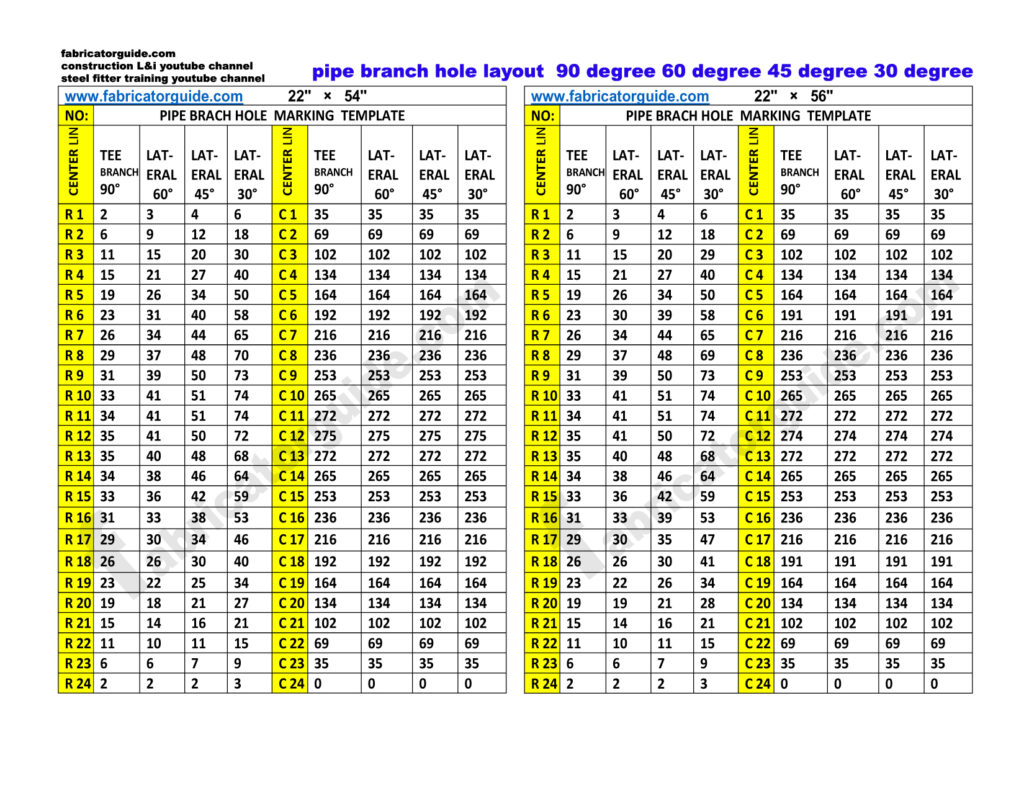
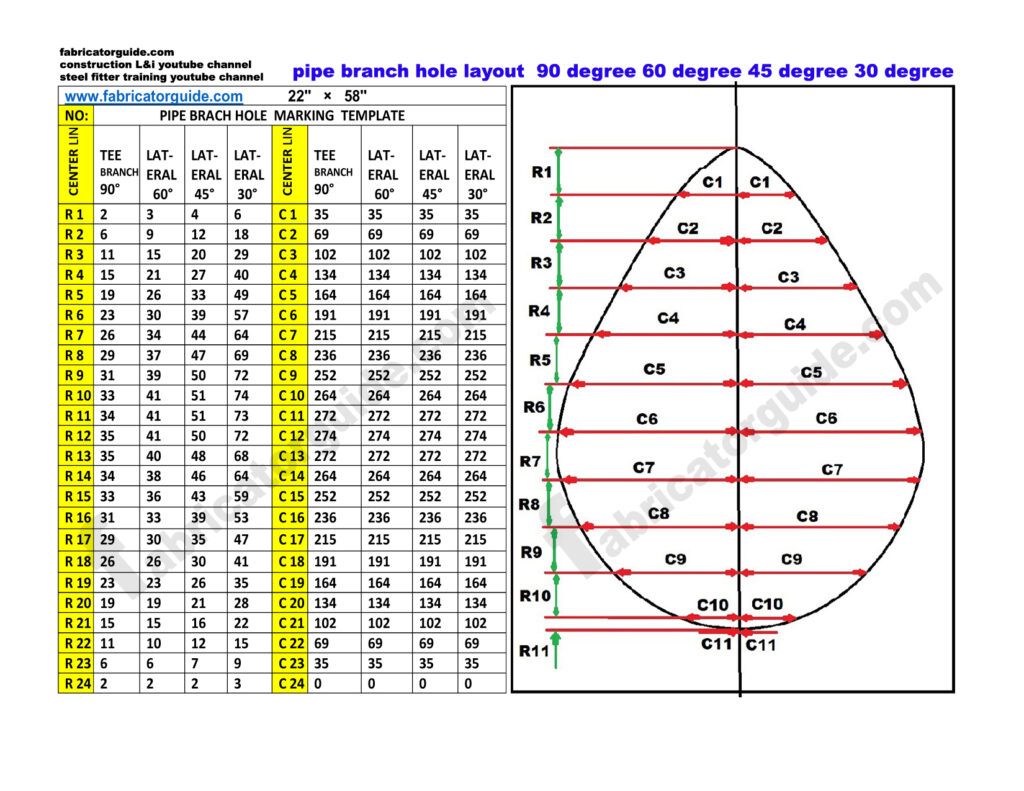
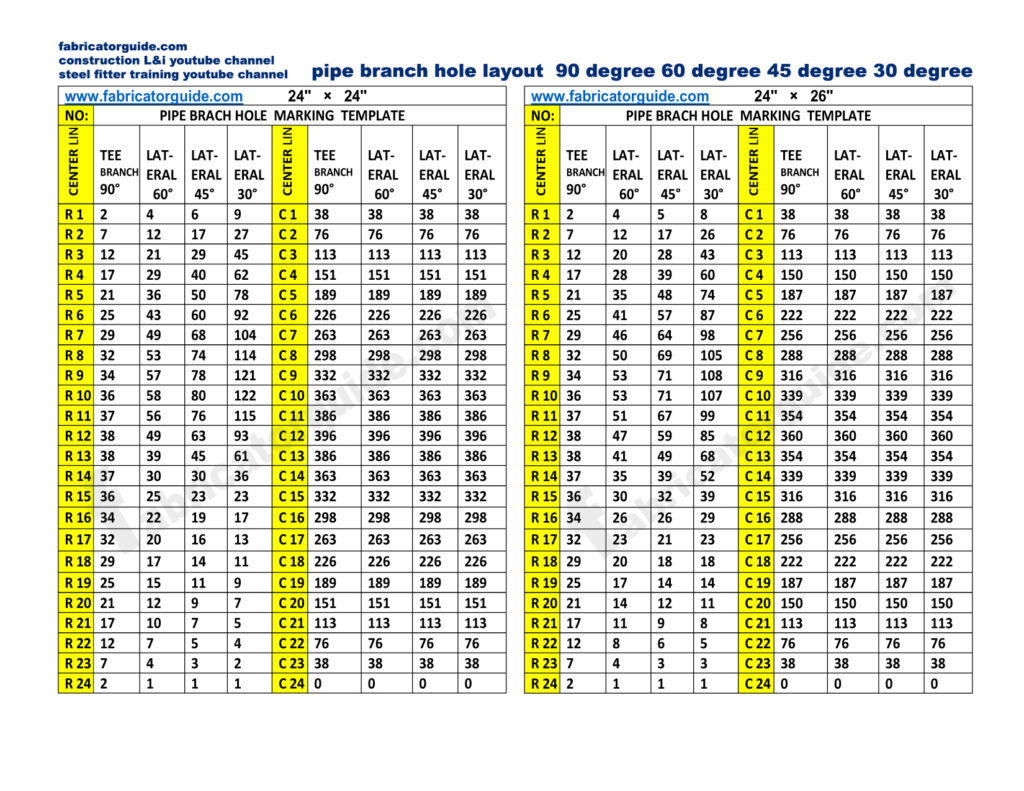
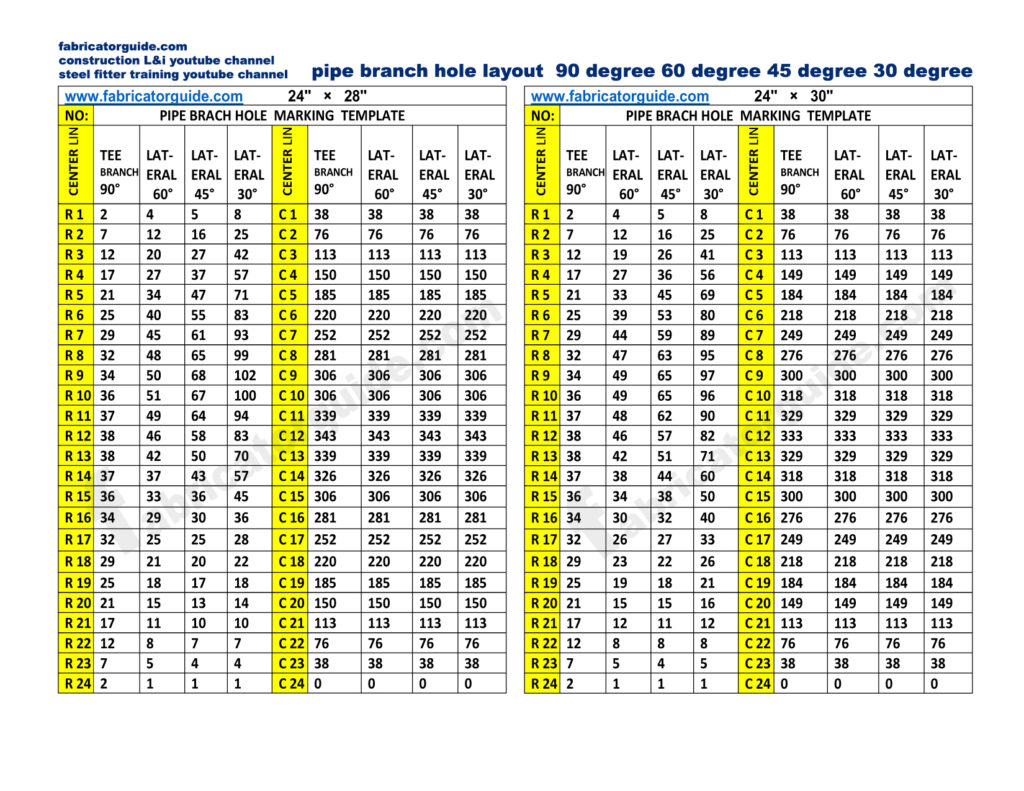
मार्किंग करने का तरीका नीचे फोटो में बताया गया है
यह एक लेआउट टेंप्लेट है इस लेआउट टेंप्लेट के जरिए कैसे मार्किंग करना है थोड़ा और डिटेल में जान लेते हैं
सबसे पहले ऊपर में आप देखेंगे तो पाइप का साइज दिया रहेगा
और R 1 और C 1 यह दोनों आपको ध्यान देना है
पाइप के ऊपर एक बीचो बीच सेंटर लाइन खींचना है और उसके ऊपर यह सब मार्किंग करते जाना है
It has been described how to mark pipe branch hole through PDF chart
Pipe branch can do hole marking of pipe branch in 90 degree 60 degree 45 degree 30 degree
The method of marking is given in the photo below.
This is a layout template, how to do marking through this layout template, let us know in a little more detail.
First of all you will see at the top, the size of the pipe will be given
And both R 1 and C 1 have to pay attention to you
Above the pipe is to draw a center center line and marking it all over it
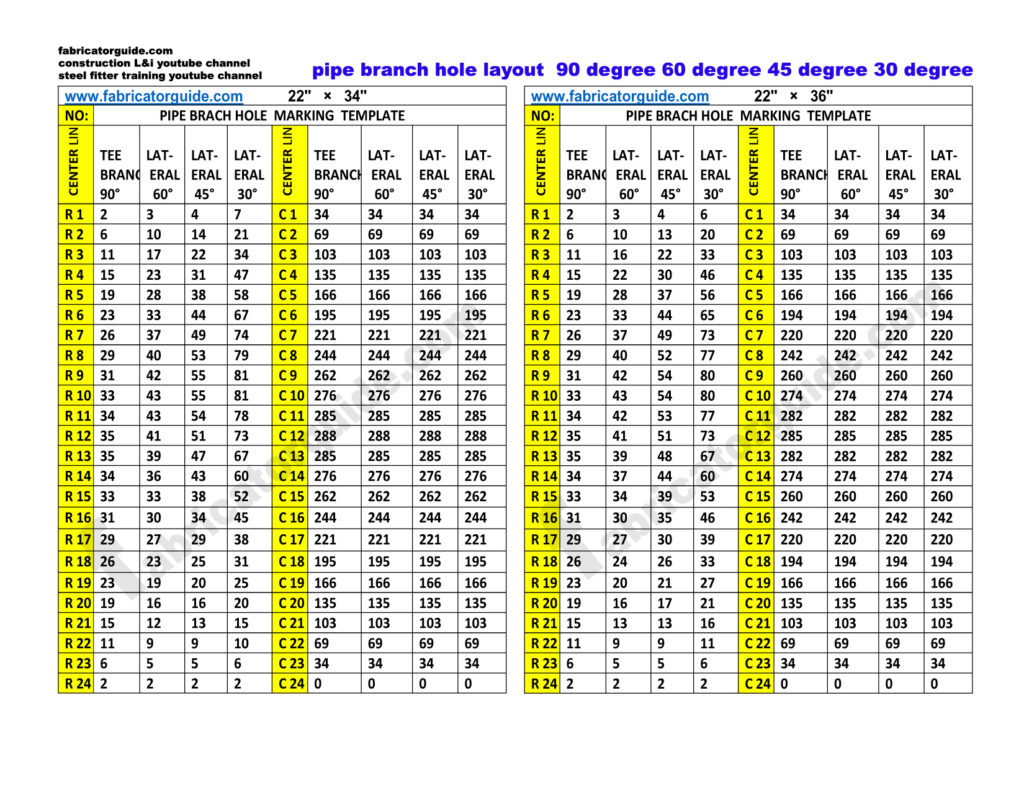
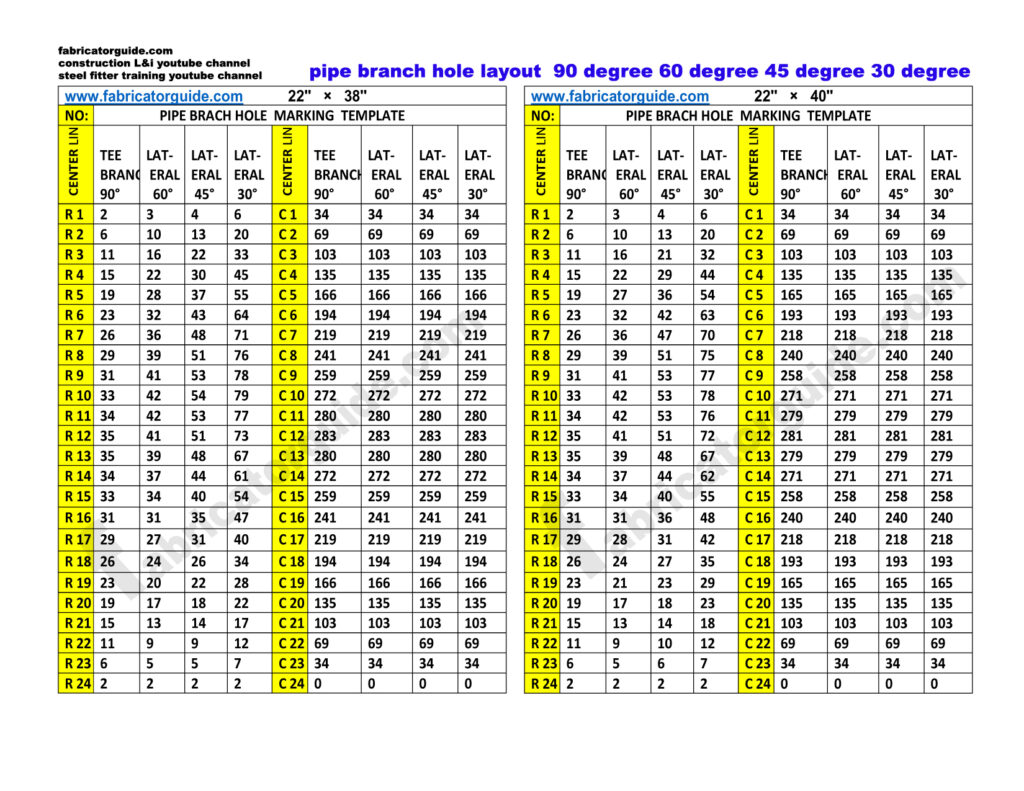
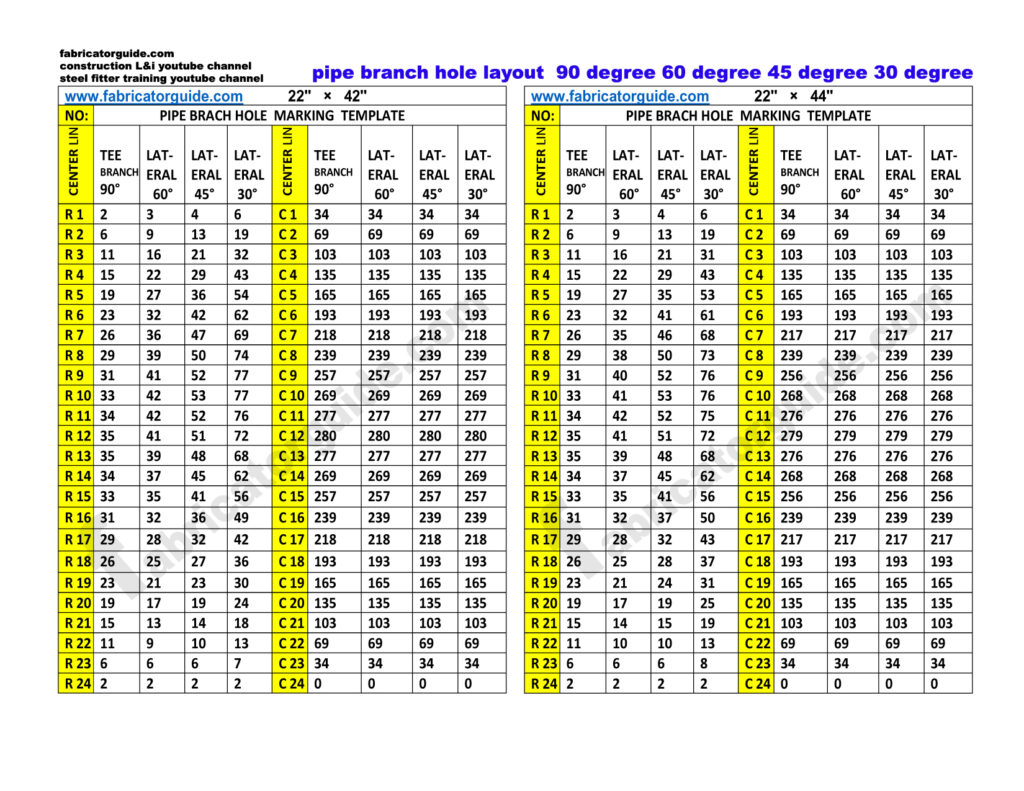
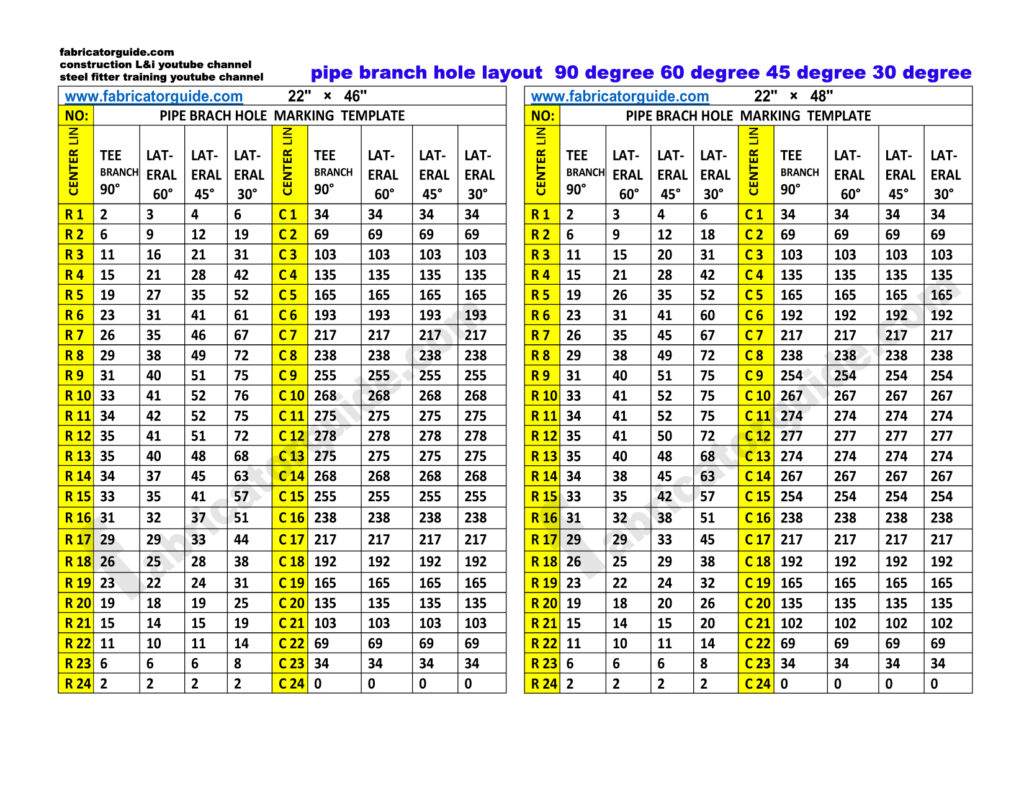
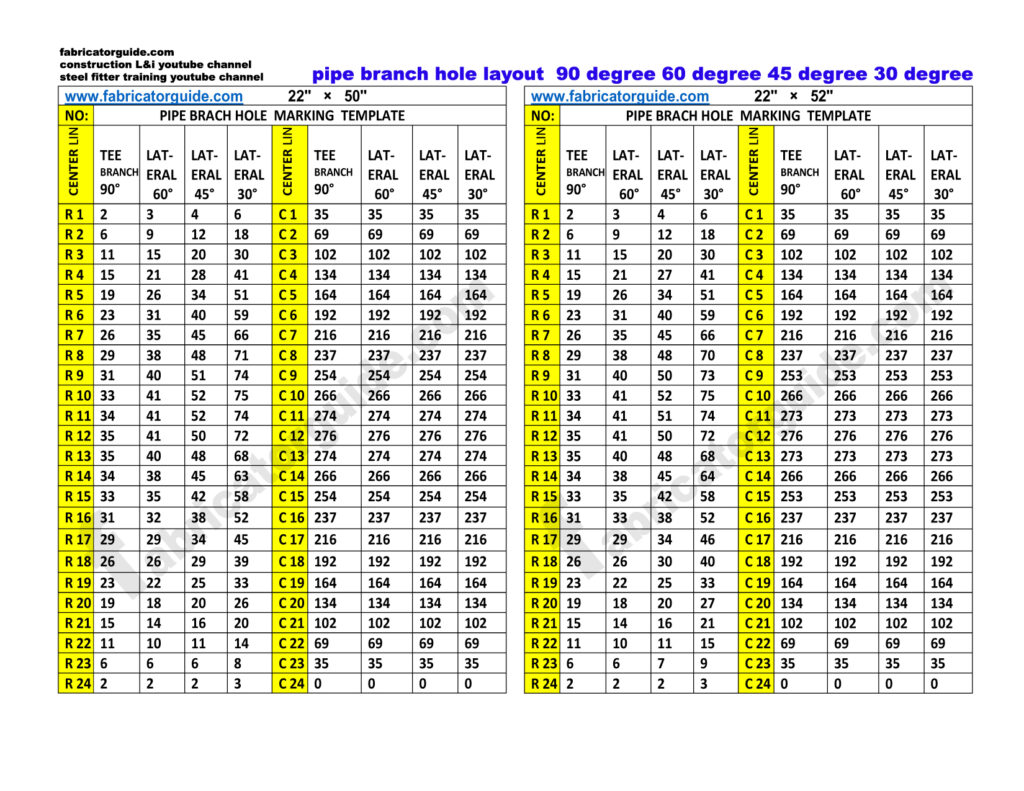
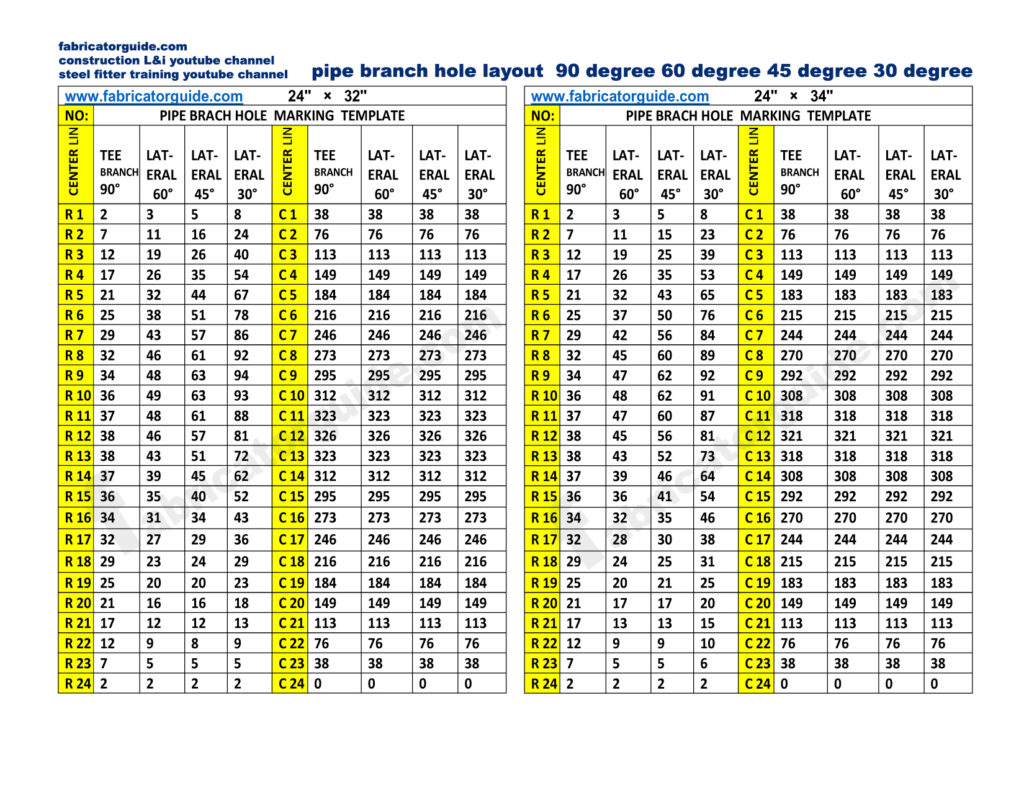
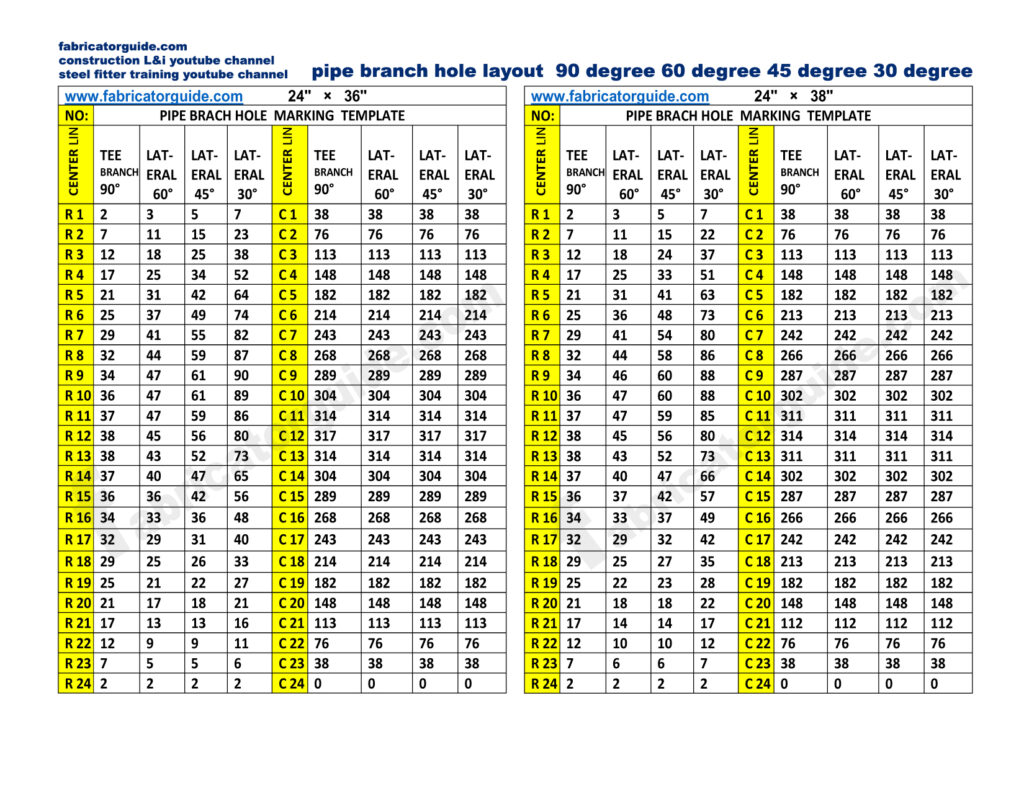
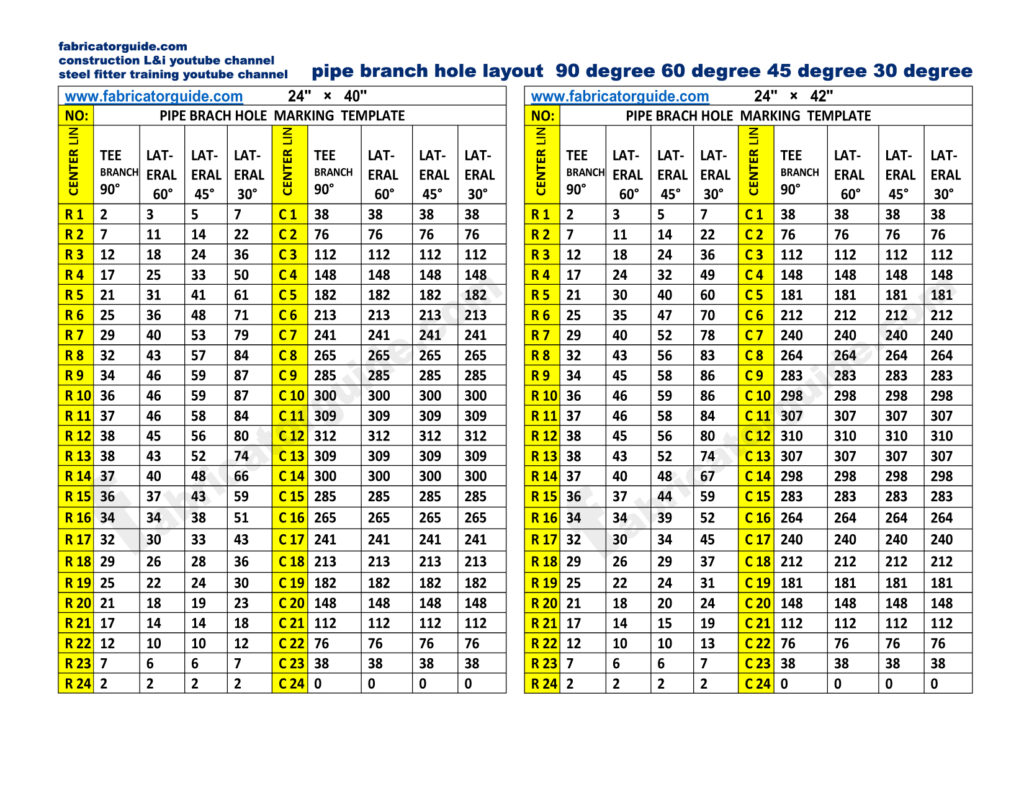
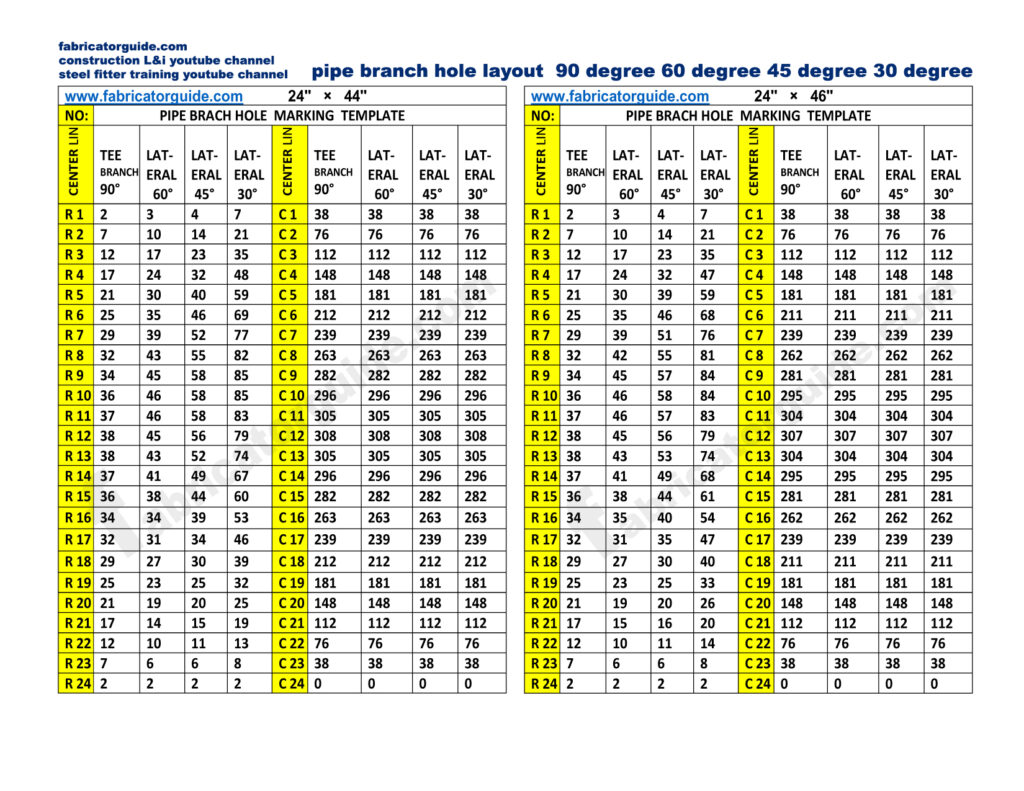
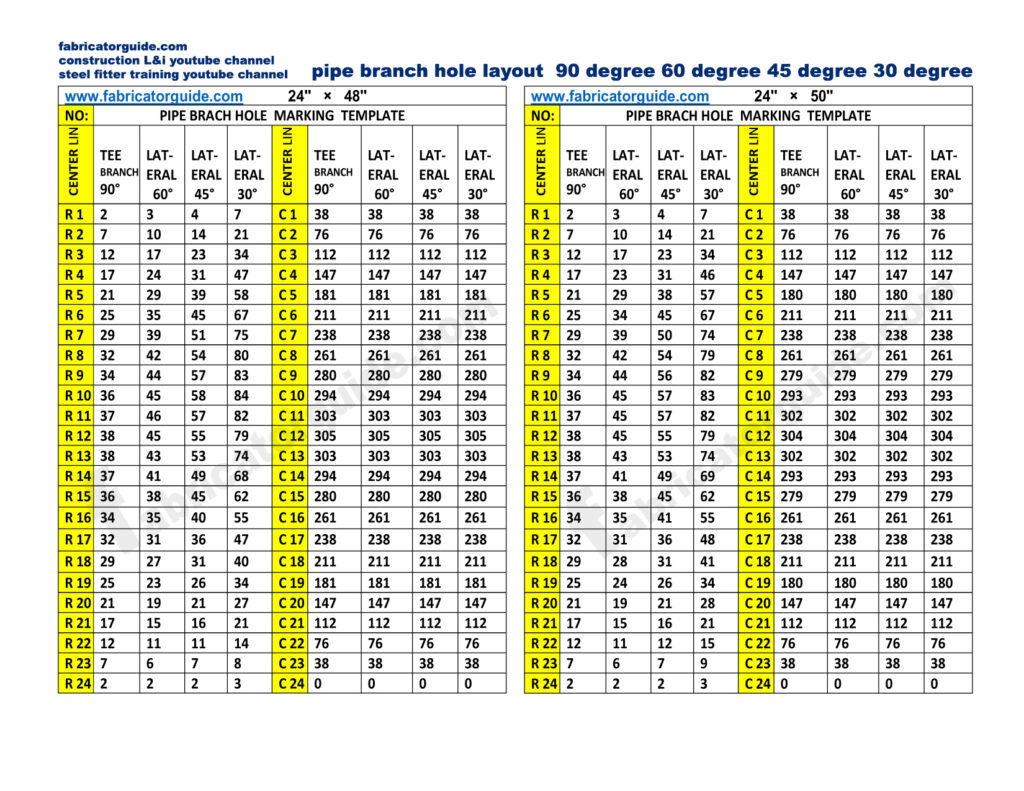
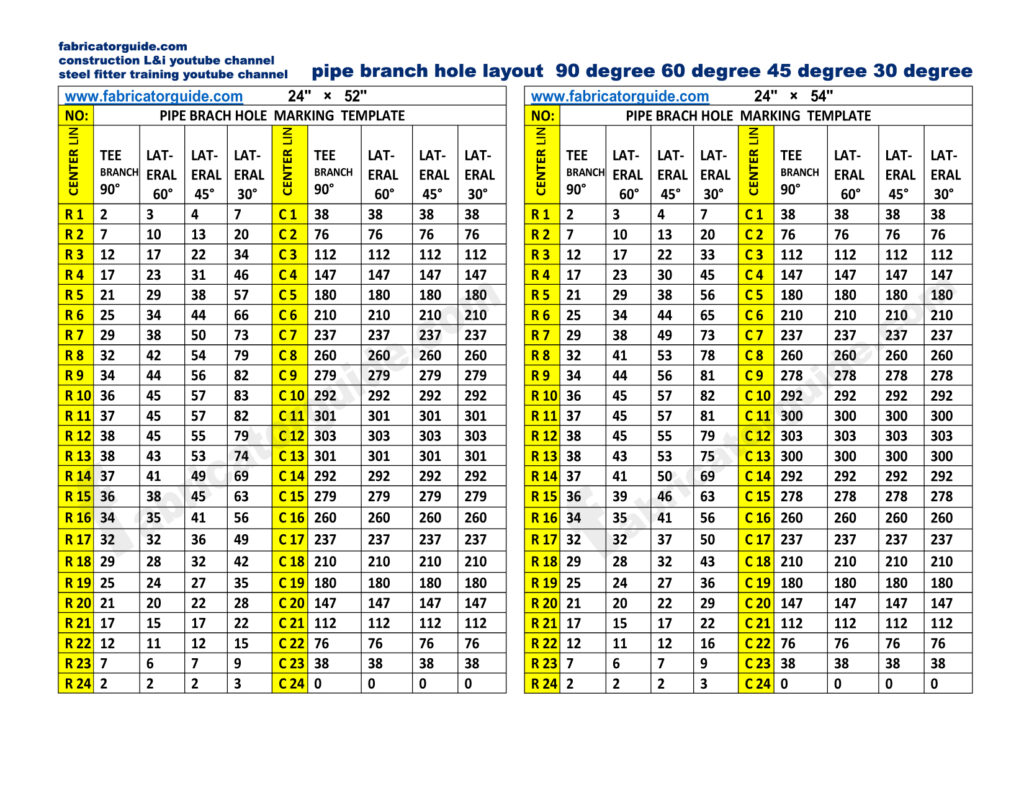
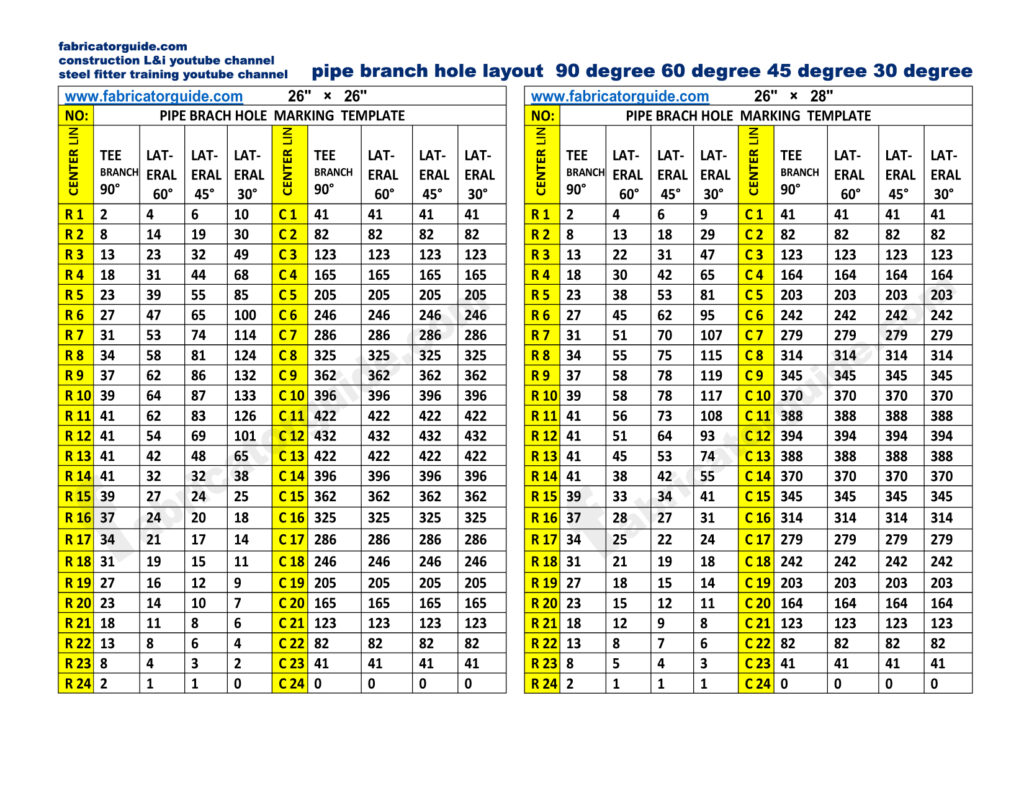
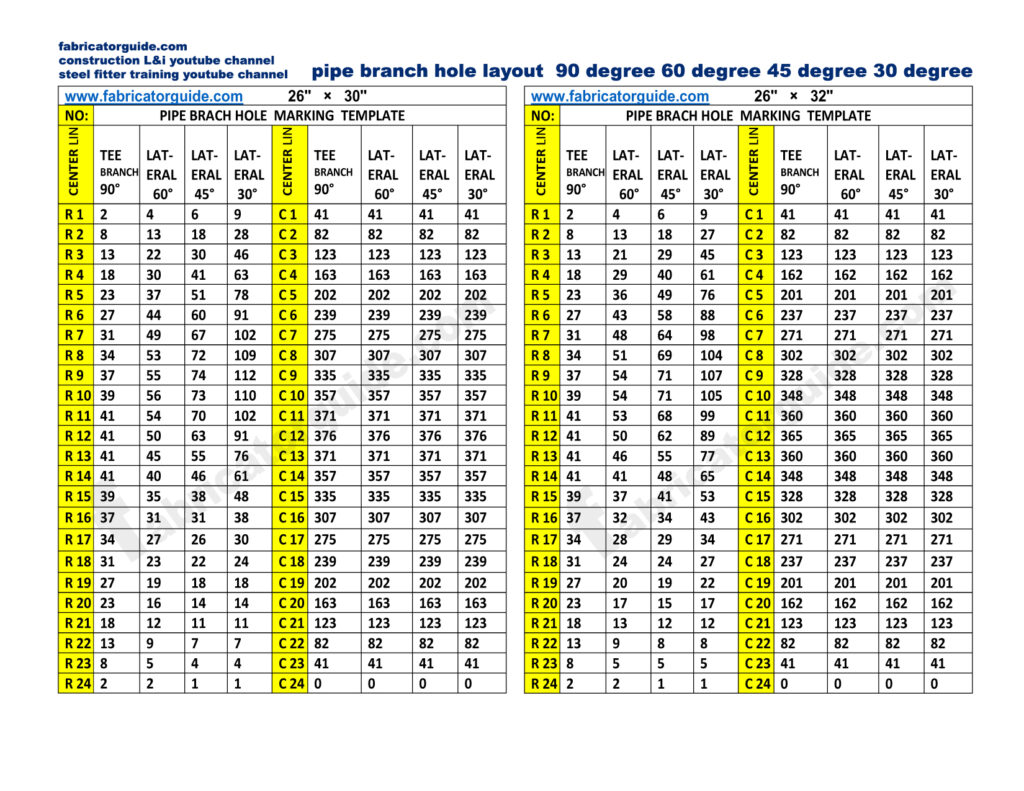
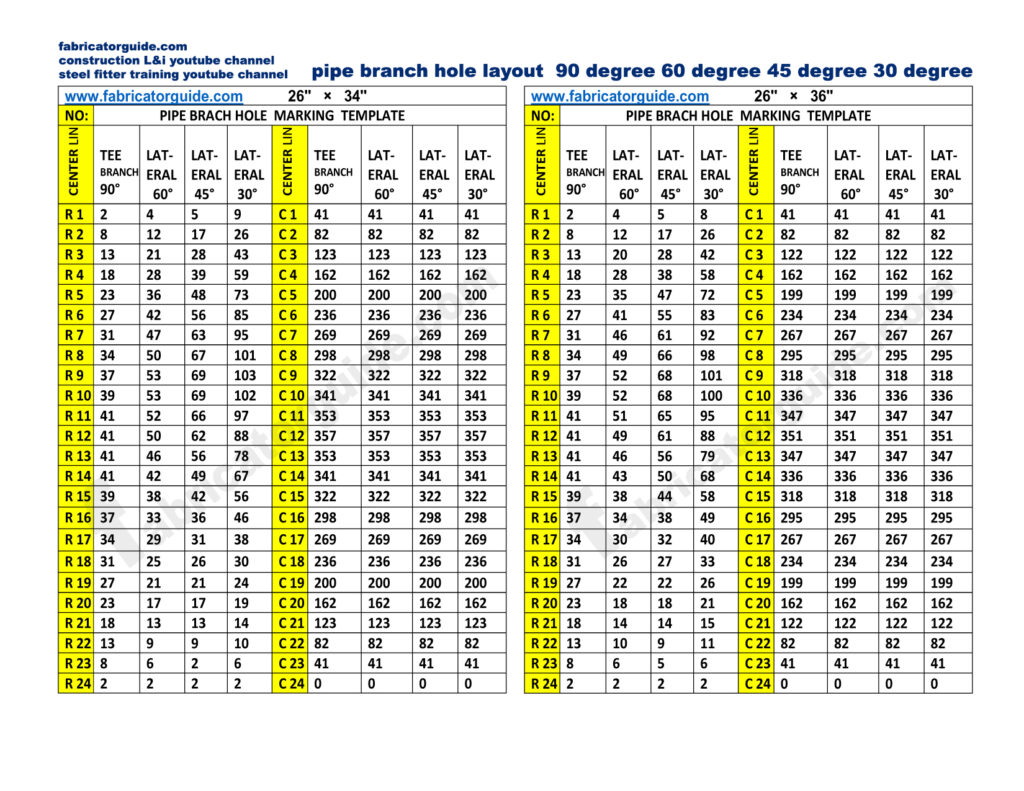
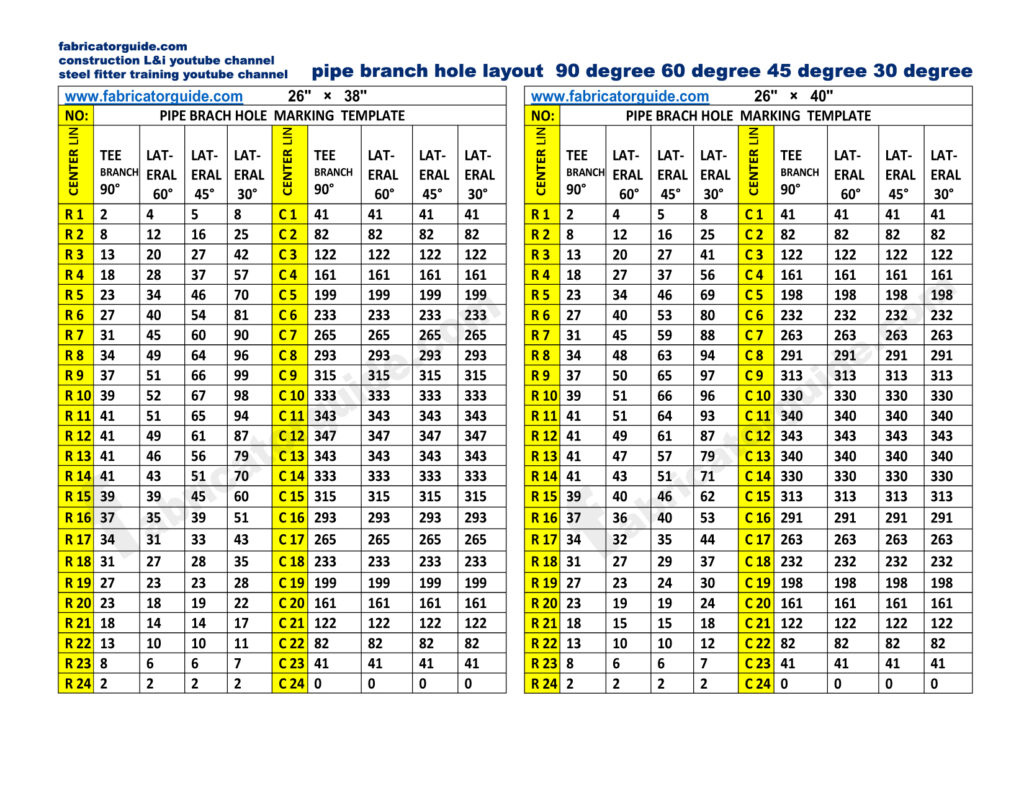
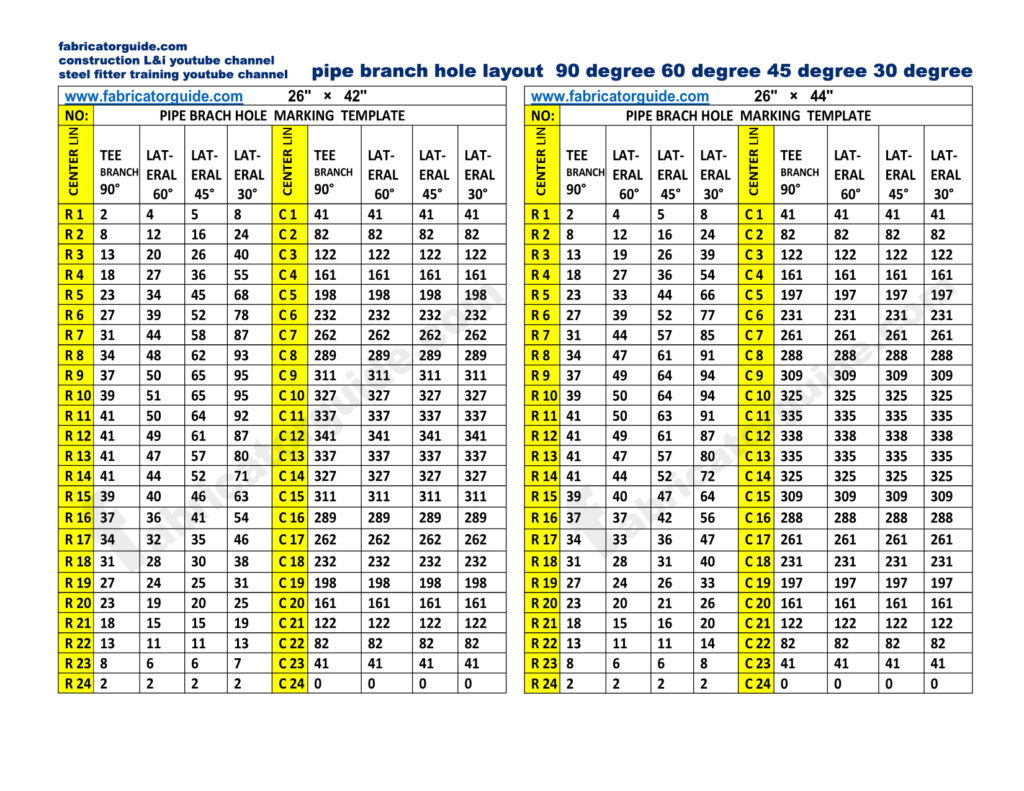
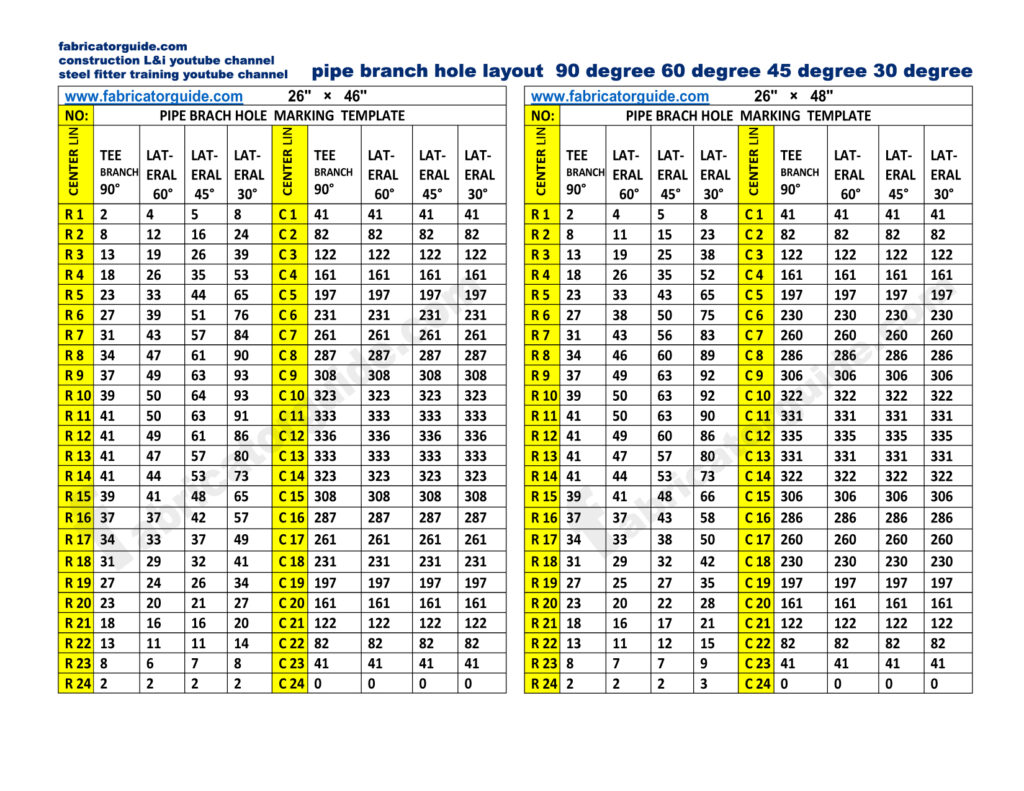
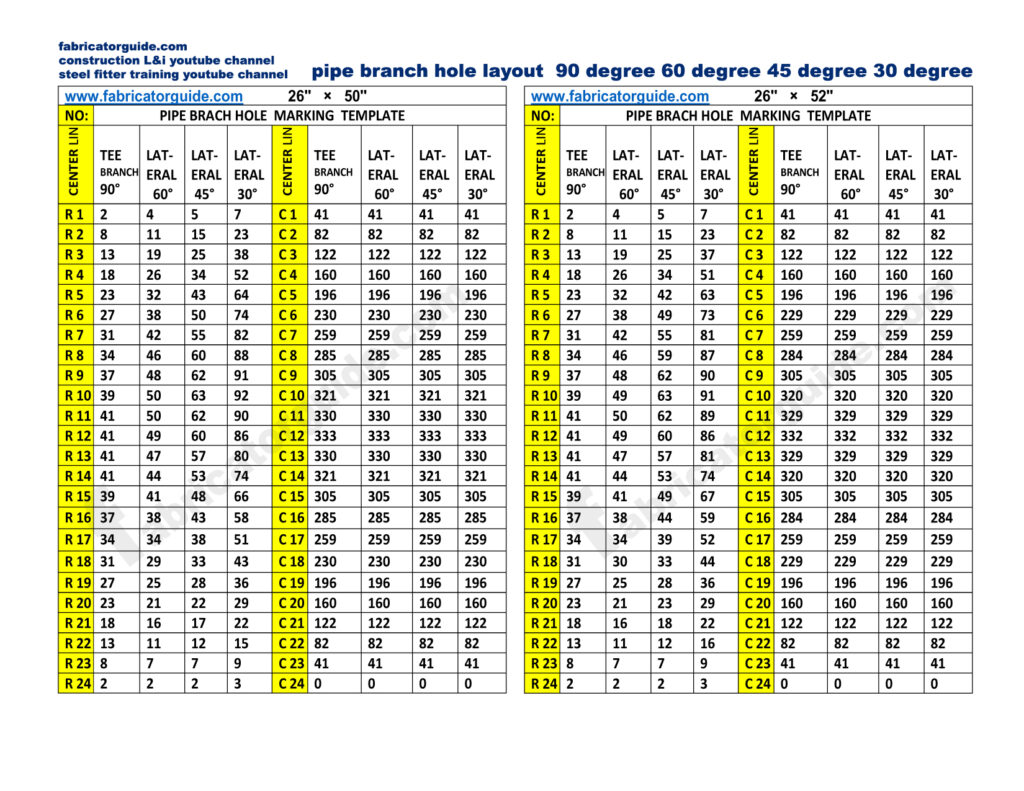
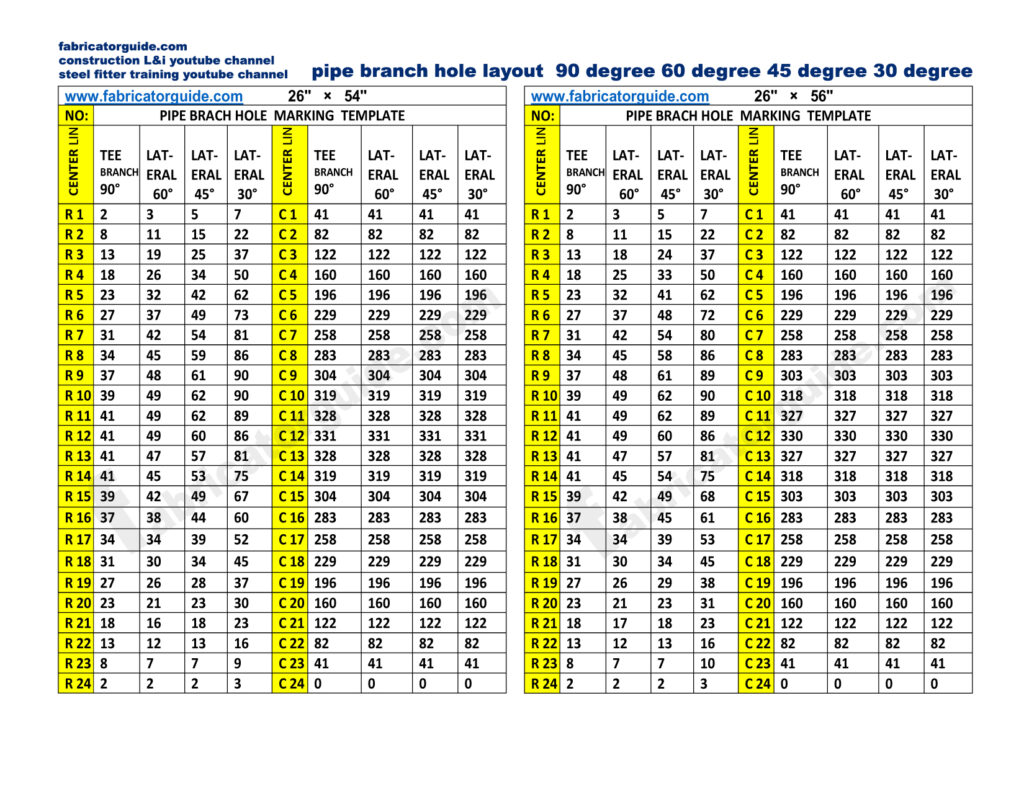
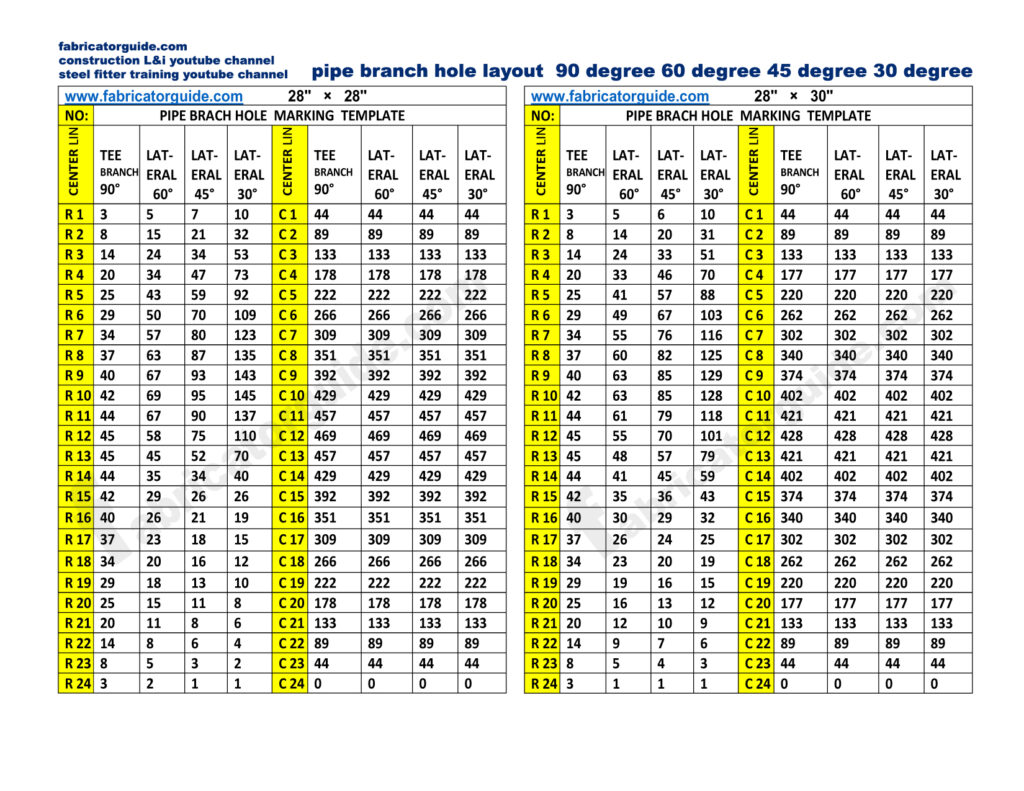
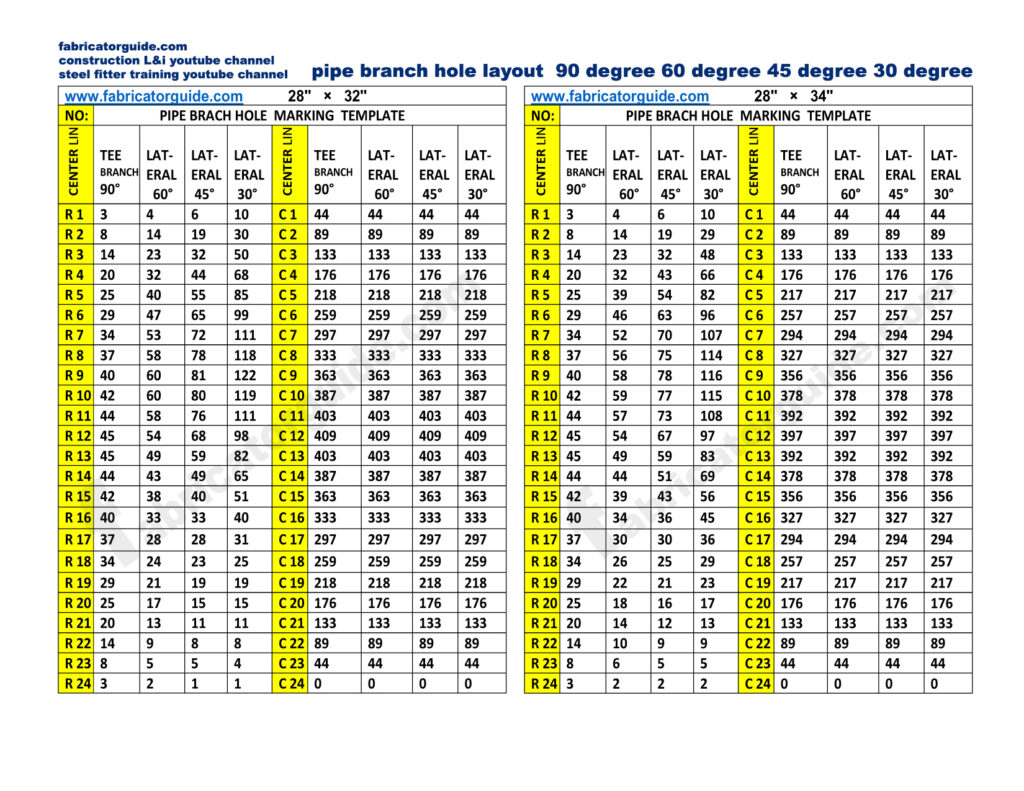
pipe branch hole marking chart (4)
पाइप के ऊपर पहले मेन सेंटर लाइन मार्किंग करें
और उसके बाद जितना सेंटर लाइन में दिया गया है उतना राउंड मार्किंग करें जैसे 16 सेंटर लाइन में कट बैक किया गया है तो 16 राउंड मार्किंग करे पाइप के ऊपर
एक राउंड मार्किंग से दूसरे राउंड मार्किंग का दूरी R1 R2 R3 जैसे डायमेंशन दिया गया है उसी के हिसाब से दूरी लेना है
टोटल राउंड मार्किंग होने के बाद उसके बाद C1 C2 C3 जैसा कट बैक डायमेंशन दिया गया है वह एक-एक करके मार्किंग करें जितना कट बैक में दिया गया है
First mark the main center line on the top of the pipe
And after that mark as many rounds as given in the center line, like if 16 is cut back in the center line, then mark 16 rounds above the pipe.
The distance from one round marking to the other round marking is to be taken according to the given dimension like R1 R2 R3
After the total round marking is done, after that cut back dimension like C1 C2 C3 is given, mark one by one as given in cut back
(1) >> R 1
(2) Tee branch Hole 90 Degree
(3) Lateral branch Hole 60 Degree
(4) Lateral branch Hole 45 Degree
(5) Lateral branch Hole 30 Degree
(6) >> C 1
(7) Tee branch Hole 90 Degree
(8) Lateral branch Hole 60 Degree
(9) Lateral branch Hole 45 Degree
(10) Lateral branch Hole 30 Degree
PDF चार्ट के जरिए ब्रांच हॉल मार्किंग करने का तरीका वीडियो के जरिए बताया गया है
How to use pdf chart watching the video
